Wednesday, May 15, 2013

Review: Shu Uemera Beauty and Lash Bar Brown Thomas

If eyes are the windows to the soul, then eyebrows are most definitely the curtains!

I was pondering this to myself one day browsing the heady selection in Brown Thomas on Grafton Street in Dublin, when, out of the corner of my eye.....a revelation!


The Shu Uemura  Beauty and Lash Brow just popped into my vision, and I had a mental high five with myself. I was looking for a good tweezers, but did I have a good shape? So, killing to beauty birds with one stone I decided to glean some of the girls expertise.

The main premise is that the girls measure your eyebrows according to your face shape, and features. They use little rulers and mirrors to show you where your brows should start and end, and then they shape them for you, all for €20.

I can hear your brain ticking now ladies, why would I bother going to Brown Thomas when my normal beautician can pluck, wax, or thread my eyebrows into shape. Well, the reason is because these therapists are specially trained to alter your brows for your face shape, and they explain what they are doing, while you are looking at them doing their stuff! So ipso facto, when you are at home you know where your eyebrows should start and end. Great stuff altogether :)

I was lucky that there was a space available in the next half an hour, so they slotted me in (Thanks girls!)

So there I was sitting in the middle of Brown Thomas, with pencil lines all over my forehead and eyebrows......mortification or wha'?

 Sarah (my therapist) kindly explained to me that my eyebrows were too far away from the bridge of my nose, and one side was kindof wonky (my words, not hers!) Sarah also told me where my arch should be and where to pluck underneath it to emphasize the shape.

She was absolutely lovely as she told me not to remove any more hair on the inside of my eyebrows, and also to let them thicken out a bit to achieve the stronger brow look, especially for nightime.

In the end, she filled them in using the special Shu Uemura Hard Formula Eyebrow Pencil in hard 9, which really finished the shape, and filled in the sparser hairs destroyed by years of over-plucking. When using the pencil she said feather it from the middle of the brow down to the edge first, and then work the pencil from the inside edge out, using light strokes.

 I did  buy the eyebrow pencil, because I used to just use brown eyeshadow and an angle brush, and wanted to try something new. It costs €19.95 and is well worth it.

My actual pencil <3
 
The final result was gorgeous, and I couldn't wait to get out there and try it for myself. Altogether, It was a great learning experience and Sarah even threw in a few Shu Uemura samples for me too.
 
The pencil itself is as big as a regular pencil, which is longer than most eyebrown pencils, about one and a half times bigger than a Rimmel one, so that in itself is a bonus.
 
The first time I used it I was surprised at how buildable the colour is, it starts out very light, but it really builds up with looking overly dark on your eyebrows. Groucho Marx....no thanks!!
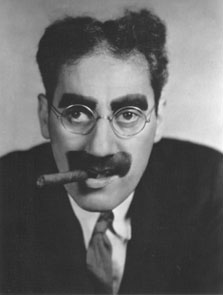
Eyebrows like Groucho...no thanks :)
There are a few tipes if you are going to go
1. Let your eyebrows grow out a bit. I wish I had let mine go a bit wild for a while, so that she could really shape them properly.
2. Be prepared for a sales pitch, leading questions such as "What moisturiser do you use" What is your regular skincare routine?" And such, answer politely, but don't get suckered into buying more than you want.
3. Prepare for a little pain, after all it is tweezing!


And that's it ladies! Eyebrows, the curtains to the windows on your soul, and Shu Uemura is like your own interior designer :)

As always, leave any comments below or on the facebook page, subscribe, retweet or add the blog on bloglovin :)
There are always more tweets than anything, for daily updates find me on twitter

https://twitter.com/FASHblogger

Also, F.A.S.H has some BIG news to share in the next week or so, so watch this space :) sssshhhhhh

Le Grá,

F.A.S.H.


Wednesday, May 8, 2013

How to : Perfect the Red Pout

With The Great Gatsby about to leap onto the big screen, statement lips are about to get, well, more statement than ever, and there is no bigger statement than a strong red lip.

The ultimate chic rouge lip has eluded many a women, from staying power to colour bleeding and beyond. But this guide will help you perfect your red pout.


1. Make sure your lips are moisturised and smooth, no matter how well you apply your lippy, if those babies are flaky and dry, it just will not work. Use a flannel or even a soft toothbrush to exfoliate your lips, and apply a small amount of Vaseline and leave on (while doing your hair or nails) for aboiut 15 minutes or so.

2. Cover your lips with your foundation, this will fill in any fine lines and provide a base for the lip pencil and colour to cling to.

3. Use a nude or light rose pencil to trace around your lips, this will stop the colour bleeding into the fine lines around your mouth. If you have smaller lips, you can go slightly outside the lip, to give the allusion of a fuller mouth. You can also give more shape to your cupids bow (the top part) if you wish. Then fill the lips in with the pencil. Again, this is building up the base for the lipstick to really grab onto, giving it great staying power.

(The reason I use nude or rose is to prevent that line around your mouth if the lipstick does wear off a little, that line is a pet hate of mine.....grrrr )

4. Apply your lipstick first with a lip brush, really filling in all the little creases on your lips, then take a piece of tissue and blot once to remove excess. Then using the brush and more lippy, go over the lips again.

This is the point where you can add gloss. I generally don't as this can make the lipstick slide around, and I do prefer the matte look of red lipsticks, but it's up to you.....

5. Do the porn-star trick, if you don't know what this is, you can look it up, (It's very funny to see people do it, and you will see why it's called the porn star) But basically, you put your finger in your mouth, and close your lips around it, and pull your finger out. Thus removing the lipstick from the inside of your lips.

(Why you ask? Well, unless you like the look of red teeth, I would highly recommend this trick!)

And that's it, your guide to the perfect red pout! All you need is to pop your lippie in your bag and retouch every now and again for beautiful, kissable red lips a la Anne Hathaway, Megan Fox and Kim Kardashian.


As always girls, leave a comment or a question here or on the facebook page. Like and share, or follow on twitter :) I'm always posting new tweets or links to great offers and ideas, which might not be on here!

Le Grá,

F.A.S.H.


Thursday, May 2, 2013

Bloglovin - Get on it, and add fash blog to your list :)

<a href="http://www.bloglovin.com/blog/7362653/?claim=9bsabr544p6">Follow my blog with Bloglovin</a>

Catrice "Pimp My Shrimp" Nail Laquer Review

The Catrice brand has grown massively in popularity since Penneys picked it up here in Ireland, and I personally thought that the price was too good to be true for quality make-up. UNTIL, a make-up artist used a lip-gloss on me! I thought "The cheek of her, using a cheap brand on me!" I know make-up snobbery at it's highest! So I asked her about the brand, and she said it's one of the best brands out there, and likened it to Essence, but better!

AS a non-animal tested, non celebrity endorsed range that releases 12 Trend Editions per year, this is a brand that is trying to be taken seriously, as you can see from it's website here:

So I thought to purchase a few "essentials" on my next shopping spree in Penney's. So here is my first mini review:

Catrice "Pimp My Shrimp" Nail Laquer


I thought that this name was just so perfect for a nail varnish that I couldn't leave it sitting alone and lonely on the shelf!

The colour is a coral colour, and dries to a slightly gloss finish. This colur is EVERYWHERE now, and a pop on your nails really makes it feel like summer.

 This laquer is like Ronseal "it does what it says on the tin", the colour is bright, vibrant and very intense and the best part is it's only €2.99 in Penneys or Sam McCauleys.


After applying two coats, I did put on a clear top coat, and I was chip free for nearly a week!

Cannot say how pleased I am with this, and will definitely be purchasing more soon ( probably nest payday!)

Are there any nail varnishes you recommend? Give us a quick review here, or on the facebook page
I love hearing new idea's and seeing new comments on the page!

So what you waitin' for, go "Pimp your Shrimp" now with Catrice!

Le Grá,

F.A.S.H